
I really love the fall. With the beautiful colors and more tolerable weather you just want to be outside more to enjoy it. As far as scrap booking goes, Halloween is one of my favorite holidays to scrapbook. I love the rich oranges, greens and purples. These colors definitely work together in my
Happy Halloween banner.
 |
| laying out the paper |
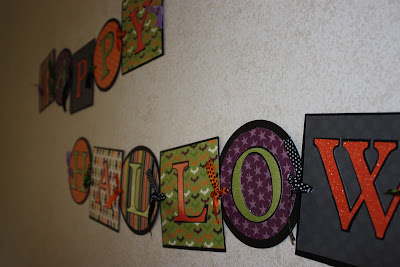
Making the banner is actually quite easy, but it isn't a 5 minute project. I cut all my circles and squares 5 1/2". I made my Cricut do all the hard labor on that. I also cut black circles and squares 5 3/4" to go behind my colorful ones so they would pop a just a little bit more.
I cut the letters in all capitals, choose your favorite font! I also cut the same letter in Shadow on the Cricut to have the black one behind the colored one. I used glittered paper and alternated lime green and orange.
 |
| I laid the letters out on top of my colored paper. |
I laid everything out on the table to make sure I thought all the colors went well together before I started to glue it all together. No orange letters on orange shapes for me. Once I was happy with my banner I started to stick the colored letter to the black letter. Since I used glitter paper I needed a heavy duty adhesive to make sure the letters would stay stuck. I used my Xyron 5" Permanent adhesive. If you don't have one of these you might want to make that investment. (I did put double sided tape on one of my letters and realized I don't have the time or patience for that process.)
I used double stick tape to put the colored shape onto black shape and made my hole punches for the ribbon.
I eyeballed the holes for my hole puncher. I didn't want them to all be exact so the irregularity would be played up.
 |
| tie letters together |
I used a variety of colorful Halloween ribbon to tie my letters together. I love ribbon! Use fairly long pieces of at least 6" long to allow room for each letter to move independently from it's partner. I like having longer pieces of ribbon between my letters on the banner but you can trim them to however long you want them.
 |
| close up |
On the very ends of your banner you may want to tie on extra long ribbon to drape your banner across your window or mantel or hang on a couple of nails. I used wall tacky on the back of each letter and stuck it to the wall. You may also rather have one long banner instead of two. Have fun!
No comments:
Post a Comment